• Skip to primary navigation
  • Skip to main content
  • Skip to primary sidebar
  • Skip to footer
  • Home
  • Blog Monetization
  • Social Media
  • WordPress
  • Resources
  • Freebies
  • Nav Widget Area

    • Bloglovin
    • Facebook
    • Instagram
    • Pinterest
    • Twitter

Lovely Blog Academy

Lovely tips for growing and monetizing your blog

AFFILIATE MARKETING FREEBIES

Download my beginner's guide to affiliate marketing & my income tracking spreadsheet by signing up to my weekly email newsletter:

Thank you! Now check your email inbox

How to add a ShopStyle Collective widget to your sidebar in WordPress

How to add a Shopstyle Collective widget to your WordPress sidebar

If you’ve just signed up to ShopStyle Collective, you’re probably eager to start monetizing your blog! In this quick tutorial, I’m going to teach you how to get started.  By the end of this tutorial, you’ll know how to add a ShopStyle widget to your WordPress sidebar.

NOTE:  This tutorial is for WORDPRESS.ORG users (the self-hosted version).  You cannot embed widgets into WordPress.com blogs.

Instructions:

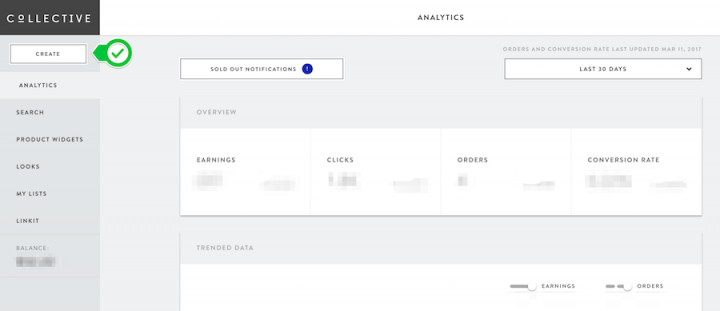
First, we’re going to choose which products to put in our widget.   Make sure you’re logged in to ShopStyle Collective before we get started.

1) First, click the "create"  button on the left hand side, under the Collective logo.

Create your widget

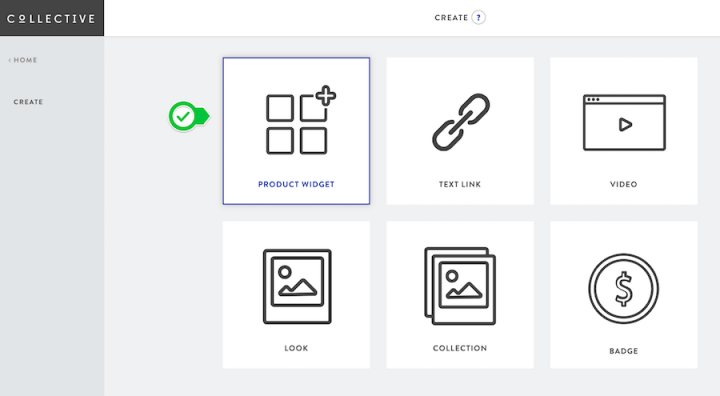
NOTE: A MESSAGE WITH THE TITLE “Introducing: Looks and Collections” might pop up. Dismiss this by clicking the   then "got it"  buttons (don’t worry, you can always find the info on their blog at a later date).

2) Choose the product widget option

Choose product widget

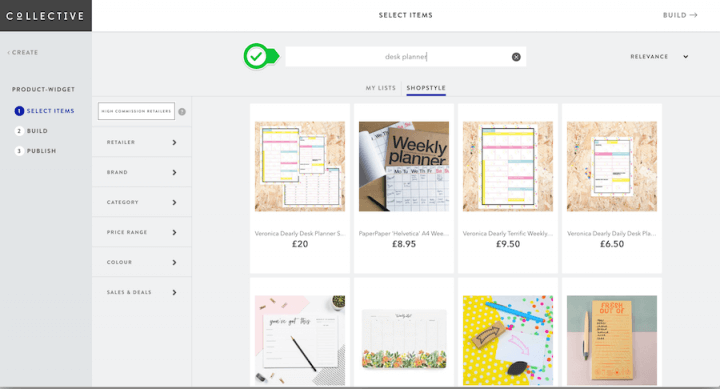
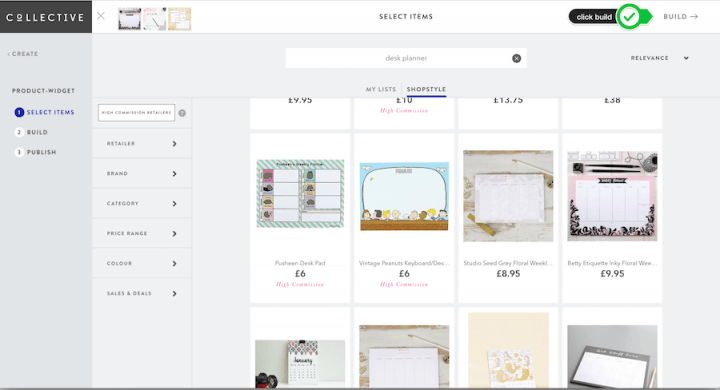
3) In the search box at the top, type in the name of the product you’d like to add to your widget.  For this example, I’m searching for desk planners.

Search Shopstyle Collective for products to add to the widge

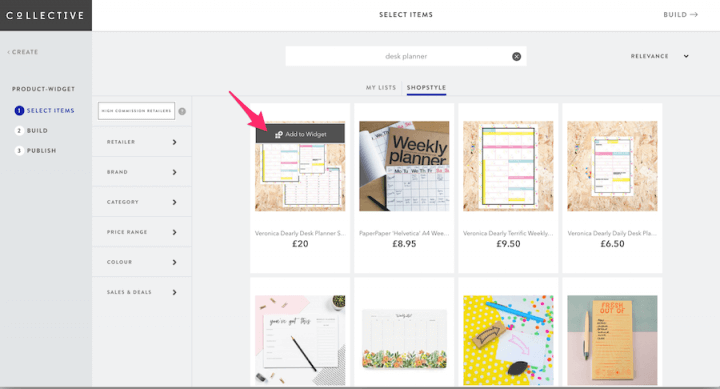
4) When you see something you’d like to save for the widget, hover over it and click the "add to widget"  button.

add to widget

5) Add as many items as you like. When you’re ready, click on the word "build"  (top right).

Click the word "build" to build a widget

6) You’ll be taken to the build-a-widget screen. On the left-hand side you’ll see a range of display options, including whether or not you want to show the brand (e.g. Chanel), the retailer (e.g. ASOS), the price, the sale price (if the item is on sale) and then whether all of that information will be shown all the time, or when somebody hovers over with their mouse. Choose to display whatever you feel works best. There’s no right or wrong answer and you can always come back and edit this in the future.

Shopstyle Collective widget options

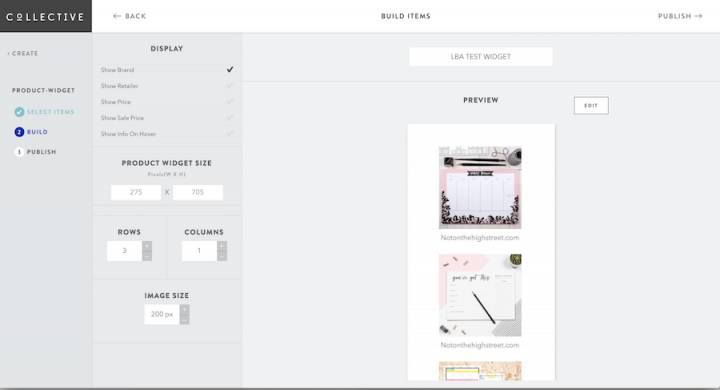
7) Next, choose a width for your widget. This will depend on the width of your sidebar. If you’re unsure, try 250 for starters (you can go back and edit the widget after this tutorial if it’s too big/small for the space).

Or, if you’d like to work out the width of your sidebar precisely, you can either look in your CSS file for the word ‘sidebar’, or use the developer tools in your browser (e.g. Chrome Inspector or Firefox Page Inspector). Just remember to account for padding!

You shouldn’t need to touch the height option, that should just automatically adjust depending on how many rows you choose to show (see next step!)

8) Choose as many rows you’d like to display.   Set columns to “1”.

9)  Leave the image size box. This automagically changes itself based on the widget’s width/height.

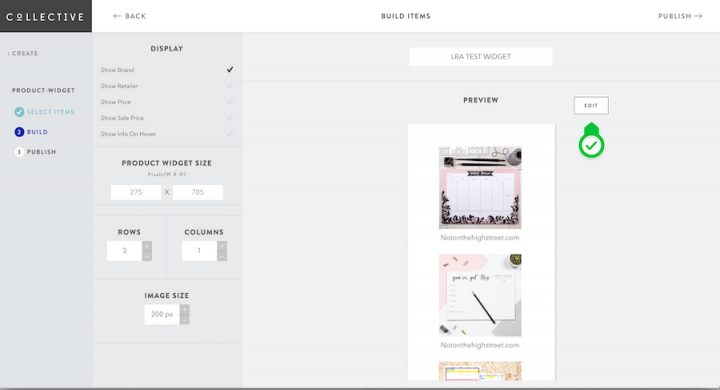
10) If you want to change the order of your items in the widget, click the "edit"  button (as shown below).

Edit the widget and change the order of the products

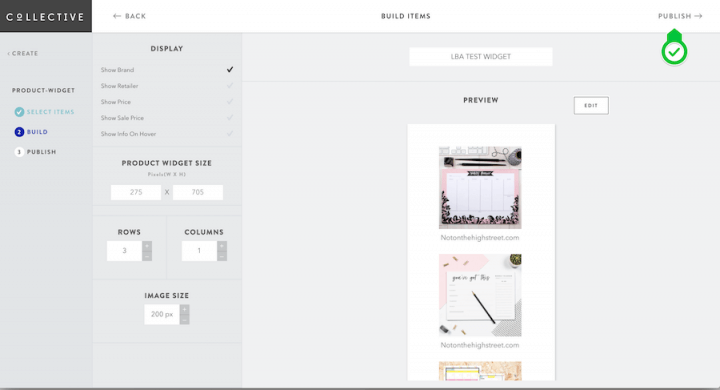
11) When you’re happy, click "publish"  (top right, at the top of the screen)

publish your widget

12) Next, you’ll be taken to a screen with your widget code. Highlight this code and click the "copy embed code"  button underneath.

copy code

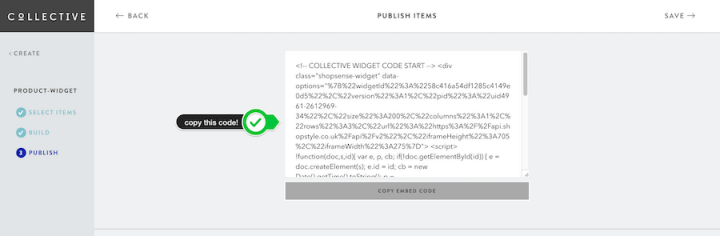
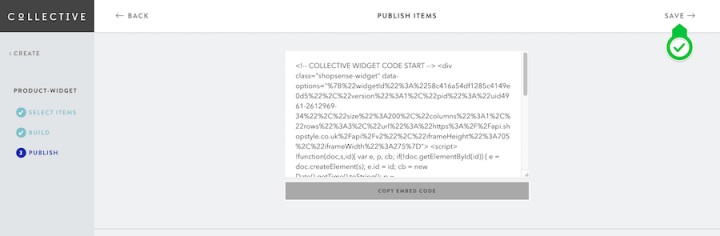
13) Before closing the page, click "save"  (top right).

save your widget

NOTE:  Another black screen might popup, asking you if you’d like to “Create a Look”. If so, dismiss this by clicking “got it thanks”.

14) Visit your website and navigate to the widgets page in the dashboard. Add a text widget to your sidebar.   Then, paste in the code from Shopstyle Collective.

paste your Shopstyle Collective code into a WordPress widget

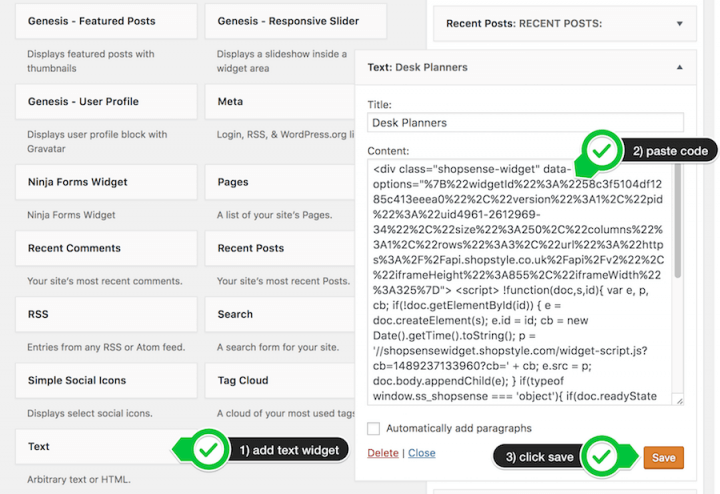
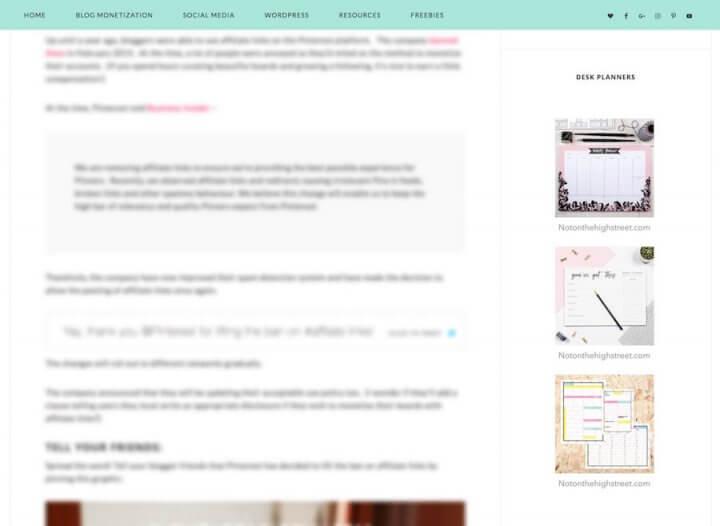
15) Click save and you’re finished.   Your widget should now show-up in your sidebar!

shopsense widget in wordpress sidebar

Any questions?

If you get stuck on any step (including how to find the width of your sidebar), please join my Facebook group and ask in there. Or, feel free to leave a comment below.

Did this tutorial help you?

If you found this tutorial useful, please consider sharing it with other bloggers by pinning the image below.  Thanks!

how to add a shopstyle collective widget to your WordPress sidebar

13th March 2017 1:05 pm Carly Filed Under: Monetizing your blog

Any questions?

Leave a comment below, or head over to the LBA Community Facebook group.

Visit us on Facebook

Advertisement

Feminine WordPress Themes

Reader Interactions

Comments

  1. 1

    sonia kolesnikov says

    15th March 2017 at 7:49 am

    HI
    the tutorial was very clear and I follow it. However, no images appear after I save the widget in WordPress. Instead the full text of the widget code still appears? HELP!
    Thanks

    • 2

      Carly says

      15th March 2017 at 11:13 am

      Hi Sonia,

      Thanks for the feedback. I’ve now replied to your question in my Facebook group. Hopefully, we can troubleshoot this together!

    • 3

      Lisa Millward says

      26th October 2017 at 6:01 am

      Yes, this tutorial was very helpful, however, I am having the same issue with the widget not showing up. Apparently, WordPress does not allow some of the HTML tag codes, such as script, iframe, form, input, and style, which are located in the embedded code. Do you know if there is a way around that?
      Thanks!

      • 4

        Carly says

        2nd March 2018 at 2:58 pm

        It sounds like you’re not using WordPress.org (the self-hosted version) but WordPress.com. Is this correct?

  2. 5

    fashionsensitive says

    22nd March 2017 at 3:18 pm

    Carly,
    This was really helpful! Thanks a lot!

    • 6

      Carly says

      22nd March 2017 at 3:26 pm

      I’m really pleased to hear that – thank you for the feedback.

      Let me know if you get stuck with anything else.

  3. 7

    Monica says

    17th June 2017 at 4:29 am

    Thank you so much!! I just started blogging this week and have no clue what I’m doing but you made it so simple.

    • 8

      Carly says

      23rd June 2017 at 11:09 am

      Hi Monica,

      That’s amazing feedback, thank you. I’m SO pleased this helped you. Good luck with your blog!

      Carly.

  4. 9

    Claire says

    3rd August 2017 at 9:35 am

    Hi Carly,

    Thank you! Yours is the only tutorial I have found that shows you where to actually paste the link once you copy it… been struggling with that for ages!!! Such a lovely blog to visit with loads of great stuff.

    Cheers,
    Claire.

    • 10

      Carly says

      4th August 2017 at 7:23 pm

      Thanks Claire,

      Your comment absolutely made my day!

  5. 11

    kelly oconnor says

    31st October 2017 at 2:11 am

    Hi

    I followed the directions, step by step as they were very clear but , no images appear after I save the widget in WordPress. Instead the full text of the widget code still appears?

    Thanks

    • 12

      Carly says

      2nd March 2018 at 2:57 pm

      Hi Kelly, is your blog on WordPress.com or the self-hosted version, WordPress.org?

  6. 13

    Marie says

    31st March 2020 at 8:33 pm

    I think there is a difference on this 2017 version from the 2020, there are no options for height and column….

Primary Sidebar

HI, I’M CARLY

If you're a blogger looking for helpful tips with a focus on monetization and affiliate marketing... you've come to the right place! ABOUT ME & THIS SITE

TRIED, TESTED & RECOMMENDED

Want to get started with affiliate marketing? I use and recommend SkimLinks. Install it and it'll monetize your content automagically. Works with ANY site:

SkimLinks

RECENT POSTS

  • Can I use Shopstyle Collective with WordPress.com?
  • Can I boost my Amazon Affiliate Links on Facebook?
  • How to add a ShopStyle Collective widget to your sidebar in WordPress
  • Can I post Amazon affiliate links to Pinterest?
  • FREE: Blog income tracking spreadsheet
  • A guide to using affiliate links on Facebook
  • How to monetize your WordPress.com blog
  • A beginner’s guide to WordPress security
  • 17 successful affiliate linking strategies you need to know
  • How to add links to image captions in WordPress

MORE FROM THE BLOG

Guide to affiliate marketing and promoting affiliate links on Facebook

A guide to using affiliate links on Facebook

How to manage mupliple Pinterest accounts using Google Chrome

How to easily manage multiple Pinterest accounts (for FREE)

Tips for affiliates/bloggers

17 successful affiliate linking strategies you need to know

AFFILIATE MARKETING FREEBIES

Join my community to get:

My beginner’s guide to affiliate marketing (5-page eBook)

My affiliate income tracking spreadsheet

Access to my private Facebook group (ask questions, share your blog etc)

My email newsletter once per week

Thank you! Now check your email inbox

Browse by category

  • Blogging Tips (1)
  • Design (2)
  • Monetizing your blog (15)
  • News (1)
  • Social Media (8)
  • WordPress (6)

COME SAY HI

  • Facebook Page
  • Facebook Group
  • Instagram
  • Twitter
  • Pinterest
  • Google+

FREE DESIGN GOODIES:

Powered by Creative Market

Useful pages

  • About
  • Contact
  • Content Archives
  • Resources / Credits
  • Advertise here?
  • Disclosure
  • Cookie Policy
  • Privacy policy

RESOURCES

ShopStyle Collective, Formally ShopSense

Here's a list of every tool, app, resource and piece of equipment that I personally use on this site (or on one of my other blogs) and recommend. The list is a mixture of free and paid resources. Disclosure:  I have used affiliate links to some of the ... Read this post

Footer

DISCLOSURE

This website is supported by adverts and affiliate marketing links. This means if you click a link and/or buy a product, I might earn a commission at no extra cost to you. These partnerships help pay for this site. Regardless of this, all opinions are my own. Read my FULL earnings disclosure here for more information.

As per the Amazon Operating Agreement I have to state that I (Carly Wood) am a participant in the Amazon Services LLC Associates Program and the Amazon EU Associates Programme. These are affiliate advertising programs designed to provide a means for sites to earn advertising fees by advertising and linking to amazon.co.uk and amazon.com.

Learn more about paid advertising & affiliate marketing:
Visit: PaidForAdvertising.com

This site also uses cookies.
You can also read about cookies and how they affect you by clicking here. My privacy policy is located here.

  • About
  • Contact
  • Content Archives
  • Resources / Credits
  • Advertise here?
  • Disclosure
  • Cookie Policy
  • Privacy policy

© Copyright 2017 · CARLY WOOD · Lovely Blog Academy